 Sims 2 – Re-Colouring Objects Using Wizards of SimPE & Gimp (Views:
15,020
)

What You Will Need:
- SimPE
- CEP – Required for re-colouring Maxis objects
- Legacy Nvidia DDS Utilities – Download and install them, just like any Windows program, then start SimPE, select the menu ‘Extra’, ‘Preferences’ and fill in the field ‘Nvidia DDS Tools’ with the exact installation path (you can use the “Browse” button to find the folder where the DDS Utilities are installed).
- Gimp – Free image editor
Click to view tutorial
Wizards of SimPE comes packaged with the excellent SimPE software. It’s a very useful tool for re-colouring objects without having to go through the whole SimPE process if, like me, you find it a bit too complicated!
I’ll also be using Gimp image editor…it’s free and powerful enough for my needs.
Here’s how to use it. Fire up Wizards of SimPE and click the ‘Recolors’ link:
In the next section, which may take a while to load, you’ll see all the different categories on the left. For the sake of simplicity, we’re going to re-colour a basic table, and I’m going to show you 2 ways in which to do it. Click the surfaces image and select the ‘NuMica Allinal Card Table’:
Click ‘Next’ and you’ll be taken to the next section, which contains all the re-colourable sections of the item you have selected. This only has one part that can be re-coloured, which is why I’ve chosen it for this tutorial.
Select any texture you like to work with, but you may not want to use the chequered one for reasons that may become apparent. I’m going to use the turquoise one:
Click the texture and then click ‘Export’:
Save the exported image where you can easily find it again…call it anything you like:
Now fire up Gimp and open the image you’ve just exported:
Now, for the first re-colour, we’re going to use the very simple method I’ve used in other tutorials. From the top menu bar, select ‘Colours/Hue-Saturation’:
Adjust the colour bars at the bottom until you find a colour you like, then click ‘OK’:
This is why we didn’t use the chequered patterned table at the start for this particular method.
Save the image, then go back to ‘Wizards of SimPE’. This time we’re going to click on the texture, then click the ‘Import’ button:
Surf to the image you saved, which should now be a different colour, the one you created:
Import the image, then click somewhere in the SimPE window to de-select the texture, which should now show the changed image:
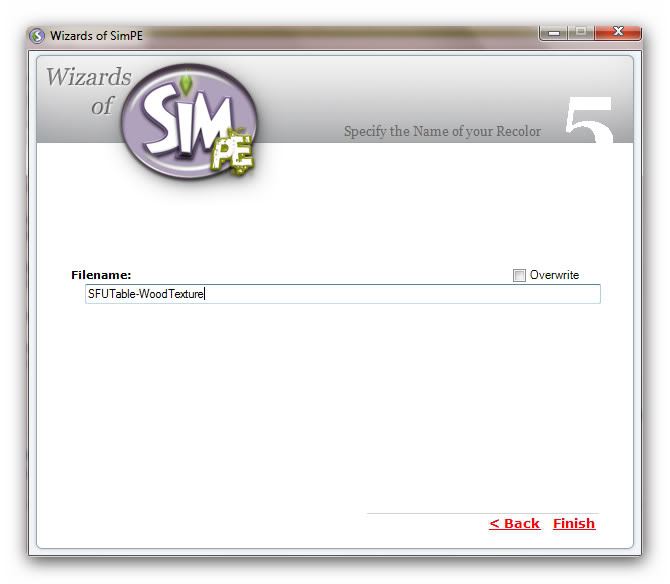
Click ‘Next’ and give your re-colour a name that you could recognise later if you want to share it:
Click ‘Finish’ to save the new file into your Sims downloads folder.
Okay, here’s a way to use a different texture to re-colour the table. In ‘Wizards Of SimPE’, go through the whole process again until you get to the ‘Export’ page. There’s no need to export the image again as we still have the old one, it doesn’t matter that it’s been re-coloured.
Open up Gimp again and open the same re-colour, only this time I’m going to use an image to re-colour the table, rather than just adjusting the hue/saturation of it.
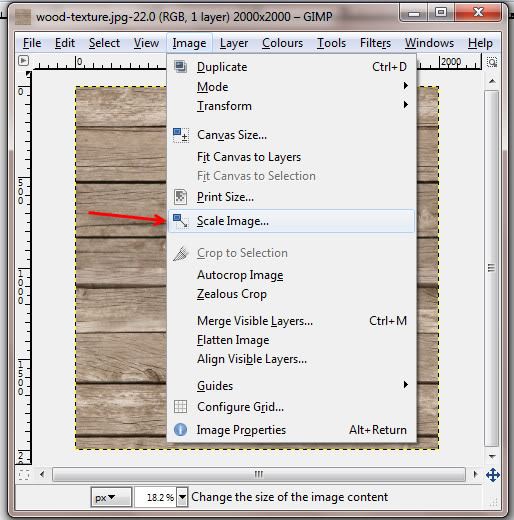
I’m going to also open an image I have on my computer and resize it:
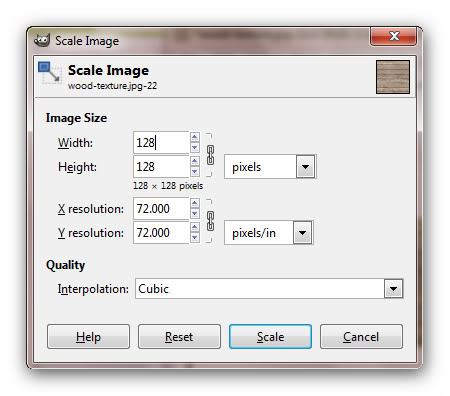
The size should be 128×128. It doesn’t have to be exact, but should be at least those measurements, as that’s the size of the exported table image. The image will automatically fit into it, but for better quality should be as close to those sizes as possible:
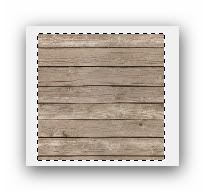
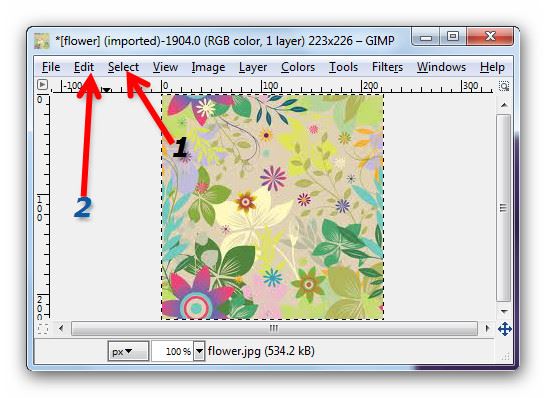
From the top menu bar, choose ‘Select’, then ‘All’ to select the image, then copy and paste it over the image of the table:
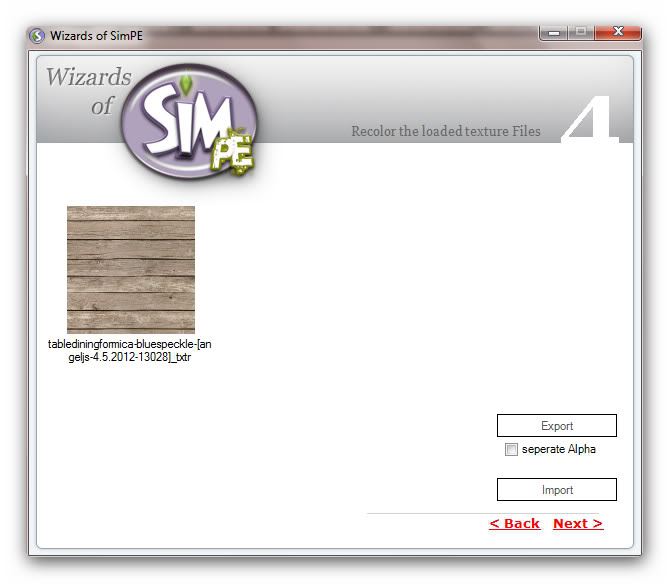
Now simply save the image, and import it back over the old one in SimPE:
Click ‘Next’ to re-name the file so it doesn’t overwrite the one you saved earlier:
Another way to re-colour is to use a texture, or pattern. You can use any seamless image you want. We have an extensive list of websites where you can find such images:
https://www.simfansuk.com/sims/thread…light=seamless
Still with your image open, open up a seamiless image in Gimp. ‘Select/All’, then ‘Edit/Copy’ to copy the image to your clipboard:
Note – you can make the image smaller for a smaller pattern.
Now, click the bucket fill tool. Make sure the pattern fill and fill whole selection buttons are clicked. Then select your pattern. Your clipboard selection will be at the top-left of the pattern selector:
Click anywhere on the image to fill it in with the pattern. Click ‘File/Export’ from the top menu to save your texture image. This can be imported into Wizards the same way.
Click ‘Finish’ and close down the program. We’re now going to fire up our game to make sure the re-colours look ok. I’ve had some hideous disasters using wood textures on this particular table, so here’s hoping!
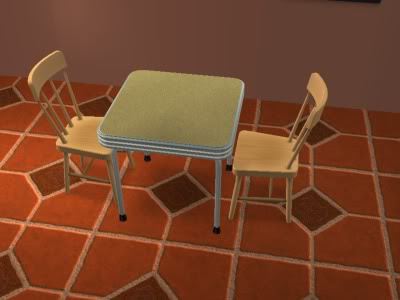
Okay, I’m in the game and thankfully my re-colours are there, and nothing went horribly wrong this time. Here’s a couple of pictures of them in action:
I’d love to know if this tutorial helped anyone, and I’d really like to see some of your re-colours in our downloads section. ![]()
There’s just one thing…when re-colouring appliances and counters etc., you will need to do 2, a clean version and a dirty one. Just to let you know! 

You must be a logged in member to download this file





Just started having a go with this Angela and got as far as importing the image back to Simpe, and I get Simpe, out of memory! Apprently on a 4.00gb Ram 32 bit operating system nothing can be done. Dont know why I’m getting it as Im on 4.00gb ram, but 64bit! Rather annoyed I still cant find a fix as so wanted to have a go at this!
Hi Angela!
Thanks so much for this! I have a question though on this. What does a clean one and dirty one mean?? Just trying to get up to speed here. 🙂
I can’t believe I never replied to this, I could have sworn I did! Here’s some info from the waybackmachine:
https://web.archive.org/web/20090904065847/https://simpeforum.ambertation.de/sims2/What-to-do-if-you-get-a-SystemOutOfMemoryException-Error
When your Sims use sinks, baths, counter tops etc., they get dirty, so the game has to have 2 versions of them, a clean and dirty one. If you are re-colouring using a texture, you would have to make the dirty version yourself by adding shading, mucky colouring etc.