 Editing Screenshots Using PhotoCommander (Views:
7,096
)
Once you have taken your screenshot you can edit the image in any image editor. I personally use PhotoPlus…It’s free, but you can upgrade very cheaply for more features.
Another good one is Photo Commander. It’s very simple to use and you can resize and crop your images as well as you can in any other software.
Take your screenshot, then paste it into the image editor of your choice. You can then crop and resize the image so it’s no more than 800 px wide. It can then be uploaded with your file.
To Use PhotoCommander:
First, download and install it to your computer. When you are ready to take your screenshots, you will need Photo Commander running at the same time as you are viewing your lot. For this, you will need to run your game in windowed mode. In The Sims 3 you can configure this within the game options.
To run The Sims 2 in windowed mode:
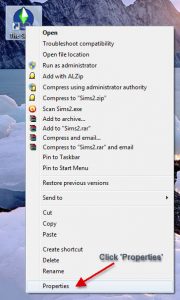
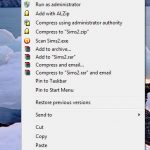
Right-click on the game icon you use to play your game. e.g. if you have Mansion & Garden installed, right-click on this icon.

If you have just the base game, just right-click on that icon, etc.
Select ‘Properties:
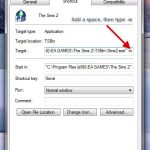
In the ‘Target:’ field, right at the end of the line, make a space, then type -w:
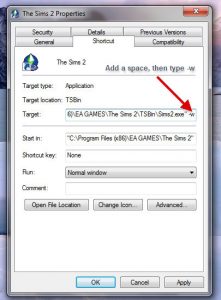
Click ‘Apply’, then ‘OK’. Now when you play your game by double-clicking on that icon, it will be in windowed mode, and you can switch between it an your photo editing program.
Okay, now to taking the screenshots. Get your camera into the position you want on your lot. Then type ‘R’ to get rid of the grid, then hit the ‘Tab’ key to get into camera mode. You can then move the camera round, and you can use ‘Z’ and ‘X’ on your keyboard to zoom in and out, and when you get the shot you want, hit the print screen key on your keyboard:
![]()
Go to Photo Commander and select ‘Edit’ from the top menu, and ‘Paste Selection’ from the drop-down.
Double-click on the image you pasted to open up the full editor. Click on the ‘Select/Crop’ button from the right-hand menu:
![]()
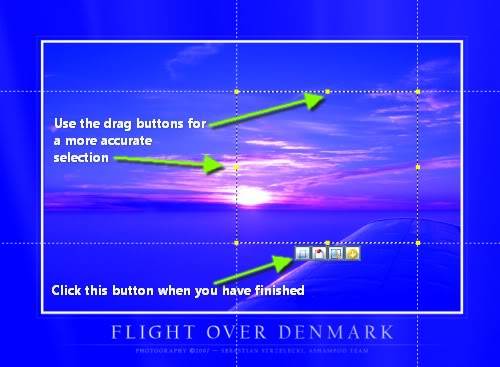
Click on your image and drag the curser to select part of it. You can resize the selected part by using the drag buttons, then click the ‘Crop’ image when you are satisfied with your selection:
![]()
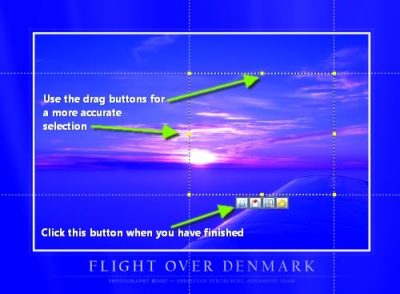
When you have cropped your image to your satisfaction, then you need to resize it.
Select ‘ Edit’, ‘Modify’, ‘Resize’ from the top menu. You just need to modify the width, and the height will automatically change to fit as long as you have ‘Lock Ratio’ box ticked. Choose a number from between 600px and 800px for the best effect.
It’s advised you make a separate folder for each lot you create to save confusion. To save your image, click ‘File’, ‘Save As’ from the top menu. Browse to the folder for the lot you are taking the screenshots for, e.g. ‘My Pictures’, ‘Sims Lots’, ‘1 The Avenue’, etc.
After you have saved your image, close down the open editing window in Photo Commander, then click ‘View’, ‘Refresh’ from the top menu to clear the image, then you are ready to start again with a new one!
I hope this has helped, but if anything is not clear, drop a reply here and I’ll try to clarify what you don’t understand. 🙂

You must be a logged in member to download this file




Recent Comments