
 Beginner’s Guide To Sims 2 Body Shop – Recolouring Clothes (Views:
14,265
)
Beginner’s Guide To Sims 2 Body Shop – Recolouring Clothes (Views:
14,265
)

Click To Show/Hide Content
First, open up Body Shop. Make sure you open the program from the latest expansion pack you have installed:

Click ‘Build Sims’ then ‘Create Parts’:
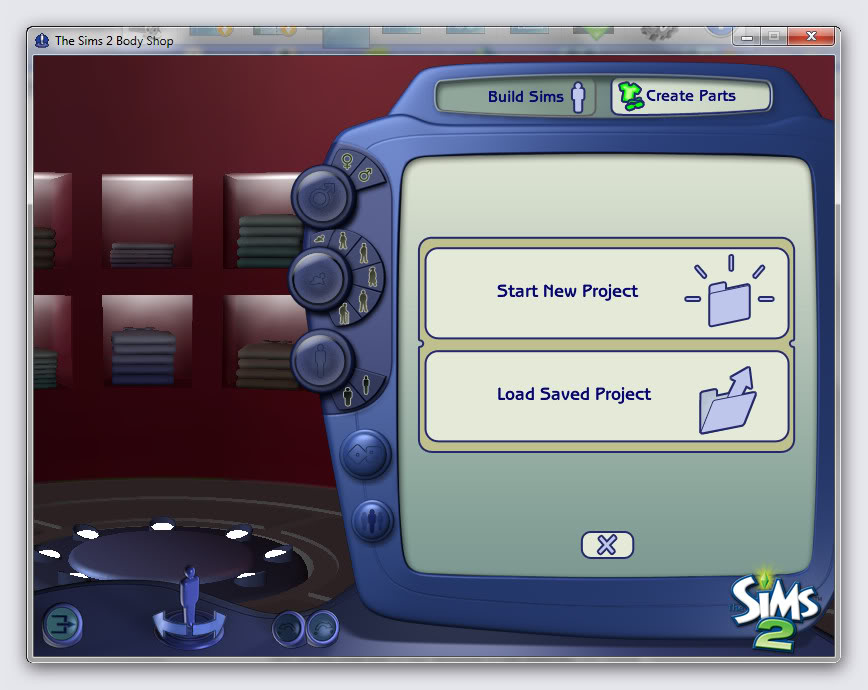
Click ‘Create Clothing’:

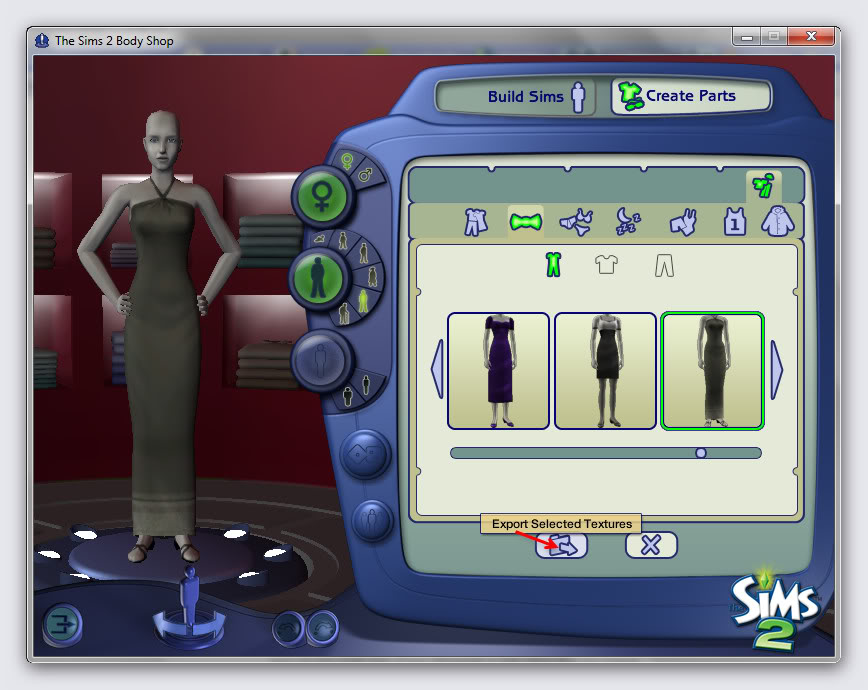
Select the clothing you want to re-colour and click ‘Export Selected Textures’:
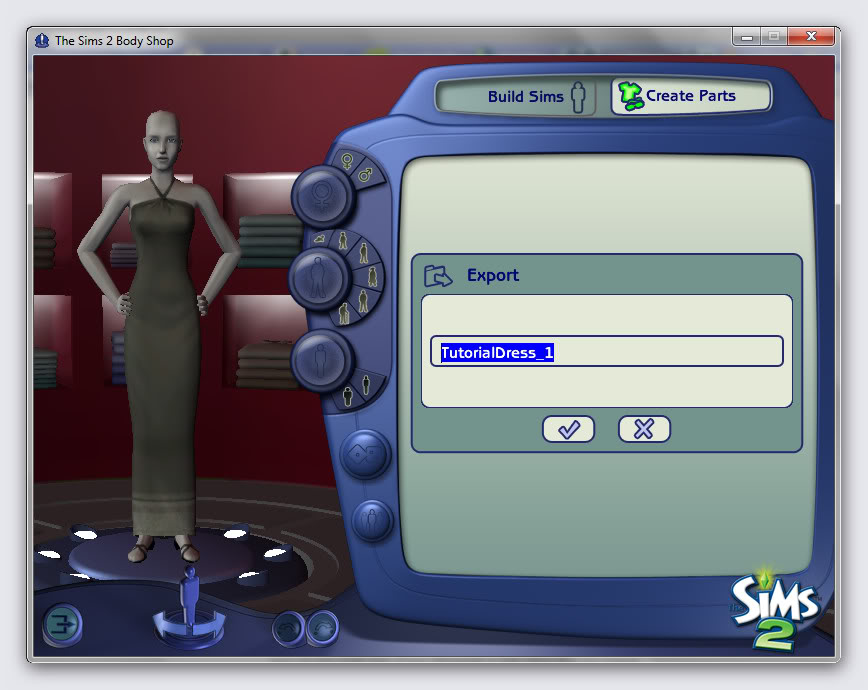
Give your project and name and click the tick (checkmark):
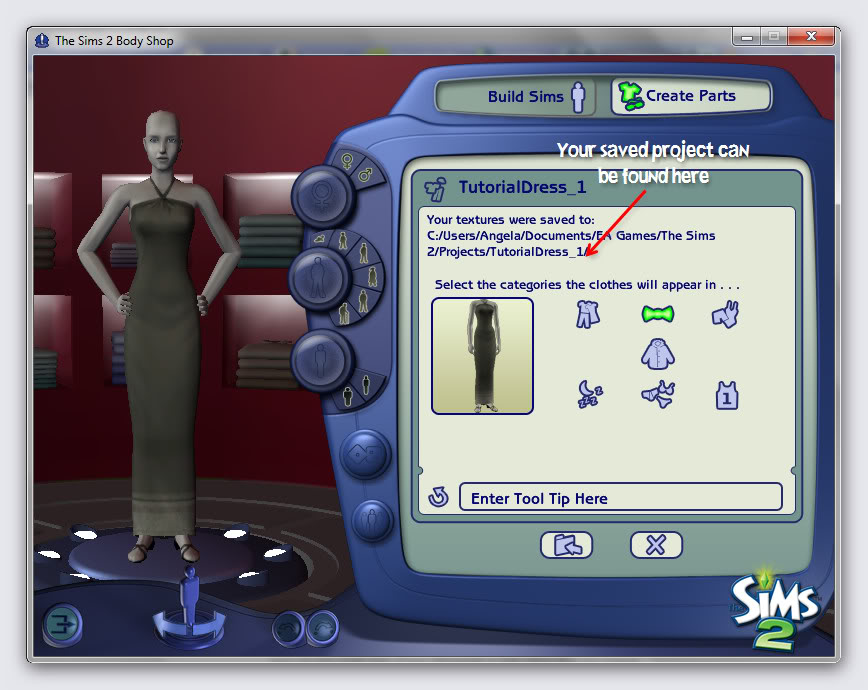
Take note of where your project can be found on your computer:
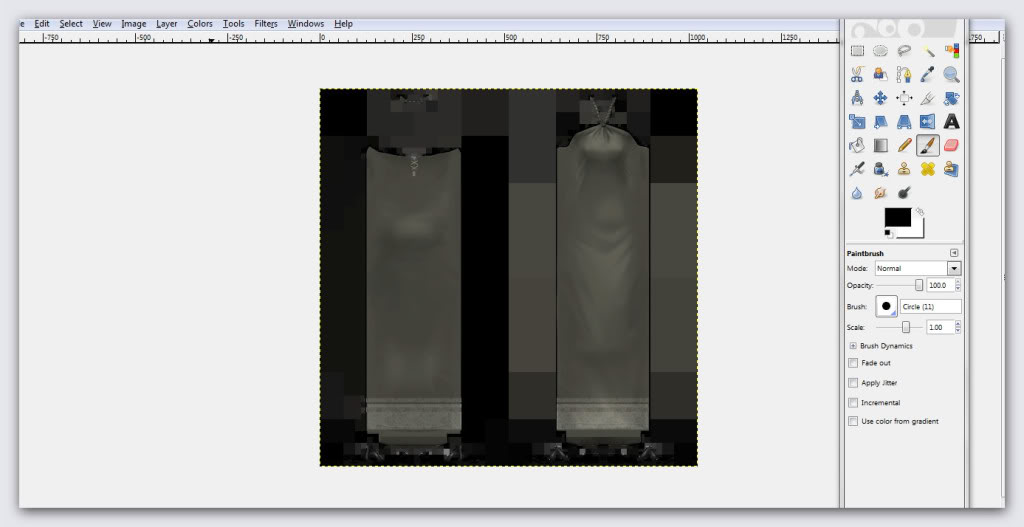
Open Gimp and browse to your project files. Open the image file that ends with ‘TextureName.bmp’:

This is what you should now see:
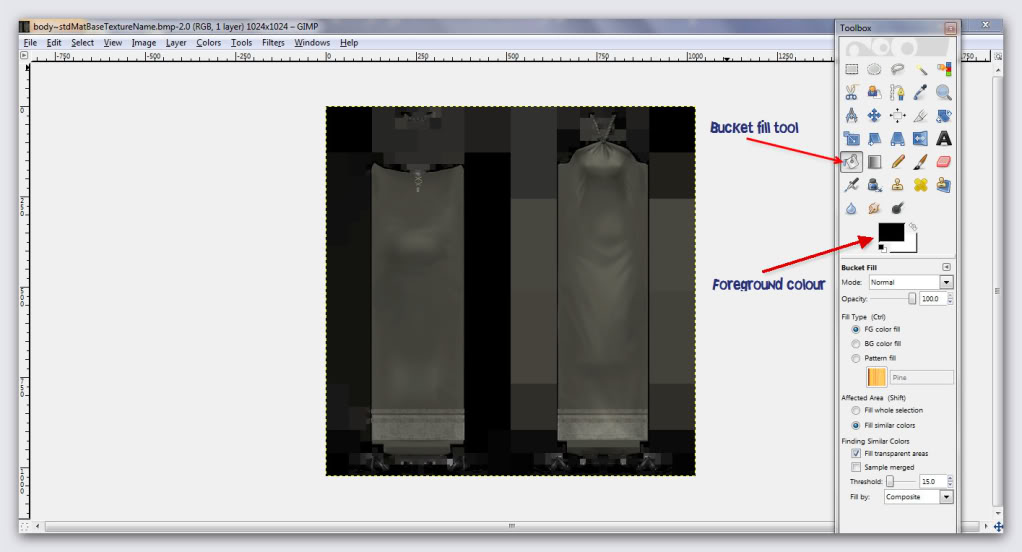
We are going to be changing the foreground colour and using the bucket fill tool to add that colour to the dress:
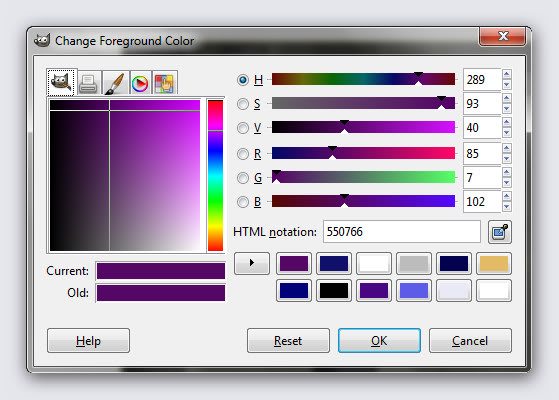
Choose your foreground colour:
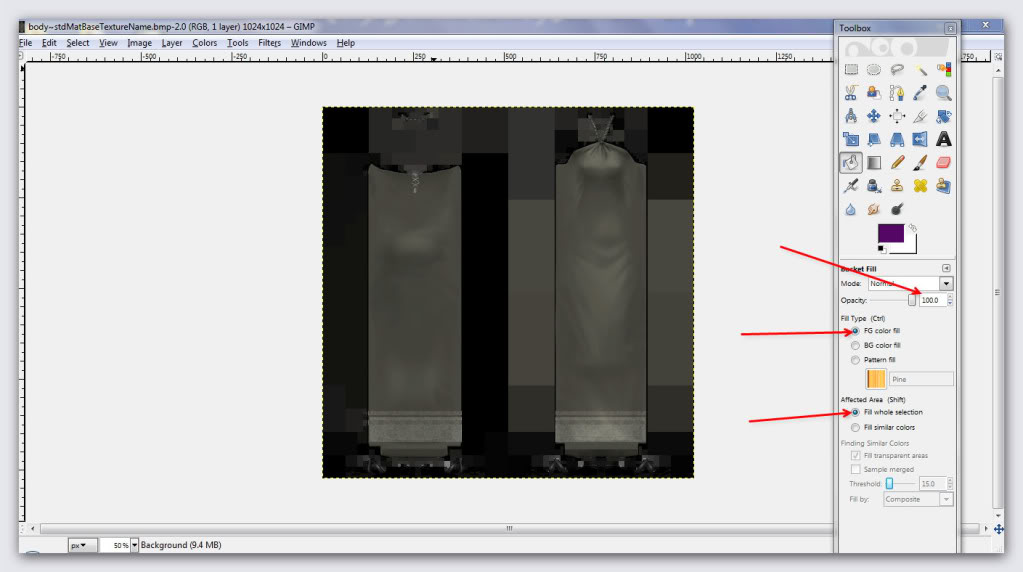
Make sure the opacity is set to 100%, the fill type selected is ‘FG colour fill’, and ‘Fill whole selection’ is selected:
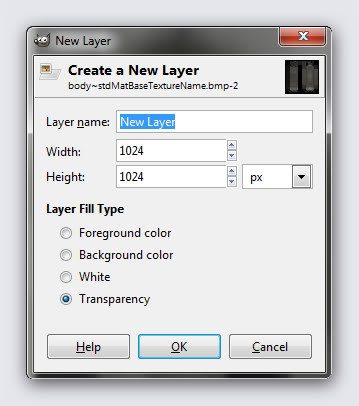
From the ‘Layer’ menu at the top, click ‘New Layer’. We will add a transparent window over the top of the image that you can colour.:
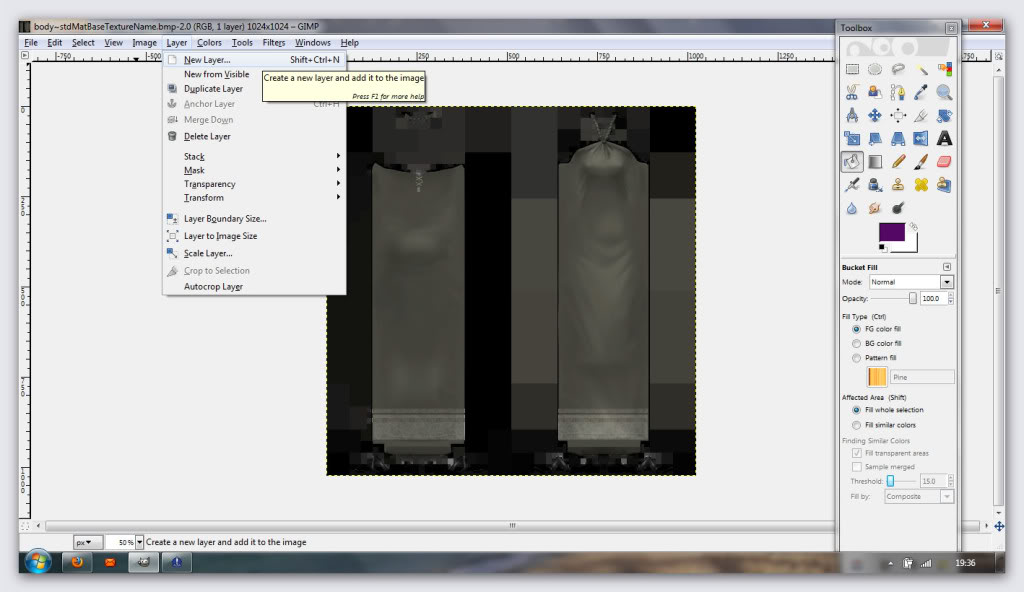
Make sure ‘Transparency’ is selected:
Now select the bucket fill tool, then click on your image to fill the new layer with the foreground colour you selected earlier:
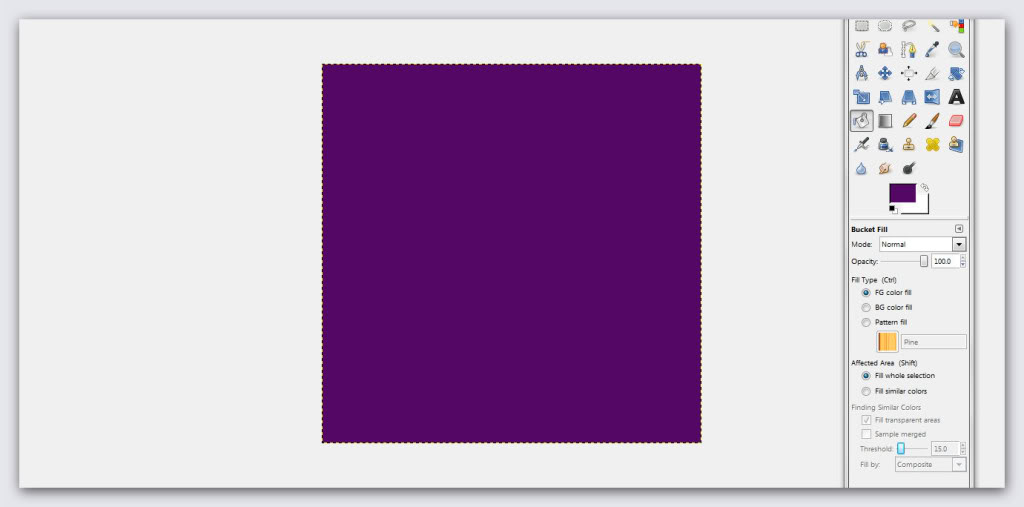
Please don’t panic, it’s supposed to look like that!
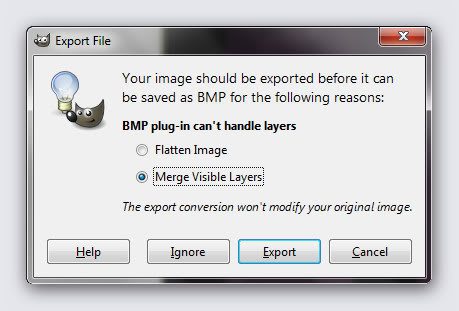
Save your image. Click ‘File’ then ‘Save’, and in the window that pops up, click ‘Export’:
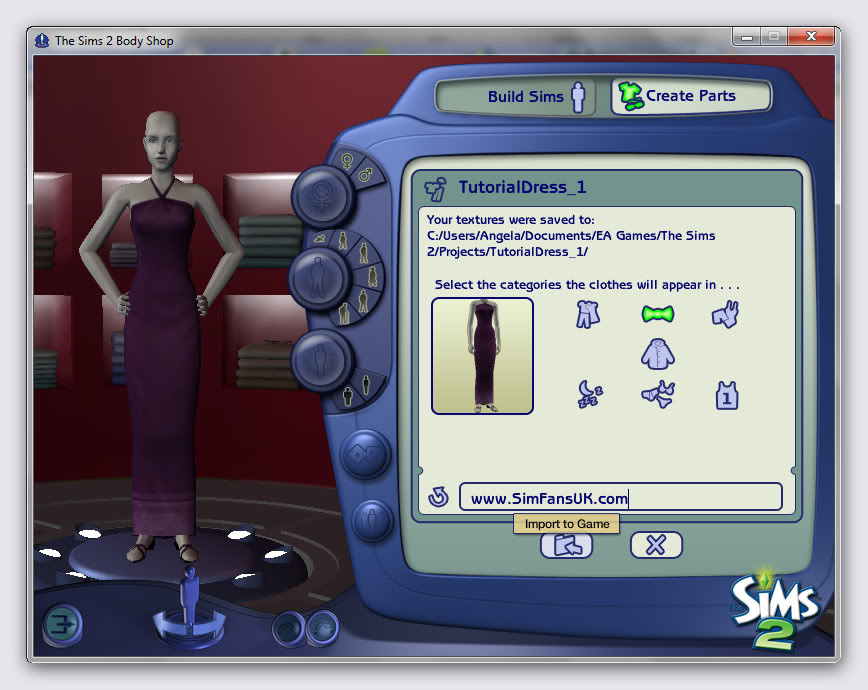
Go back into Body Shop and click ‘Refresh’ to view your new re-colour:

Enter a tooltip, perhaps a link to your site, or some site profile, then import the new dress to your game:
Well done on your first re-colour!


You must be a logged in member to download this file
Recent Comments