Editing Images With PhotoCommander 5 (Views: 958 )
Once you have taken your screenshot you can edit the image in any image editor. I personally use PhotoPlus…It’s free, but you can upgrade very cheaply for more features.
Another good one is Photo Commander. It’s very simple to use and you can resize and crop your images as well as you can in any other software.
Take your screenshot, then paste it into the image editor of your choice. You can then crop and resize the image so it’s no more than 800 px wide. It can then be uploaded with your file.
To Use PhotoCommander:
First, download and install it to your computer. When you are ready to take your screenshots, you will need Photo Commander running at the same time as you are viewing your lot. For this, you will need to run your game in windowed mode. In The Sims 3 you can configure this within the game options.
To run The Sims 2 in windowed mode:
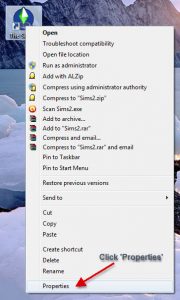
Right-click on the game icon you use to play your game. e.g. if you have Mansion & Garden installed, right-click on this icon.
If you have just the base game, just right-click on that icon, etc.
Select ‘Properties:
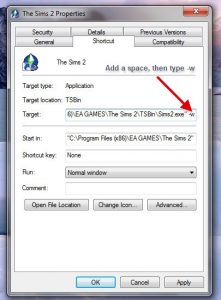
In the ‘Target:’ field, right at the end of the line, make a space, then type -w:
Click ‘Apply’, then ‘OK’. Now when you play your game by double-clicking on that icon, it will be in windowed mode, and you can switch between it an your photo editing program.
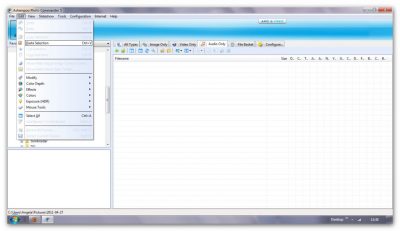
First take your screenshot. In Photo Commander, click ‘File/Paste Selection’ to pase the screenshot into the program:
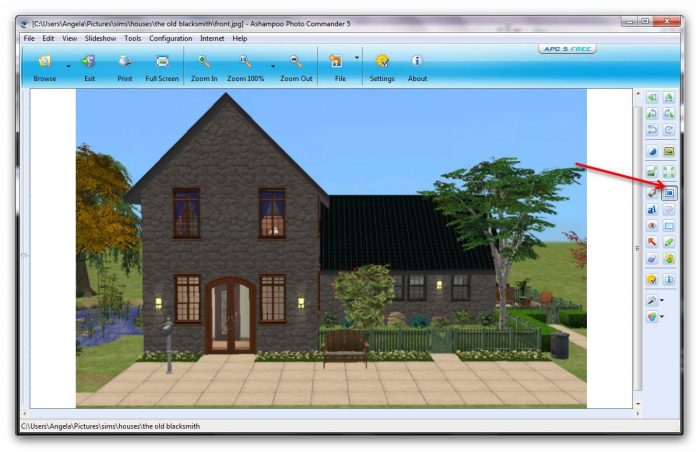
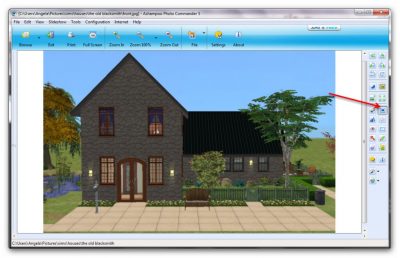
Double-click on the image you just pasted to edit it, then click on the ‘crop’ icon in the right-hand menu pane:
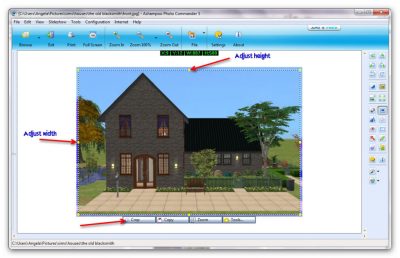
You can use the ‘scroll’ on your mouse to show more or less of the image to make editing easier. To crop the image, place the cursor where you’d like to start, then holding the left mouse button down, drag your cursor to make the selection.
You can use the little, yellow boxes at each side to resize the selection, and once you’re ready, click the ‘Crop’ button at the bottom of the image:
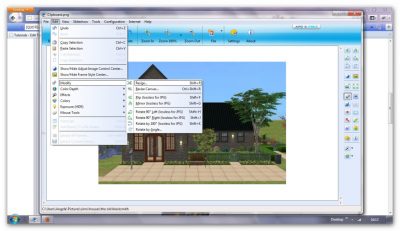
To resize the image, go to ‘Edit/Modify/Resize’:
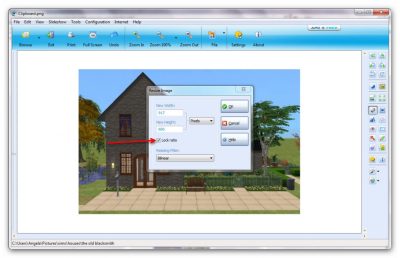
In the box that pops up, if you have ‘Lock Ratio’ ticked, whichever size you alter, the other will adjust automatically:
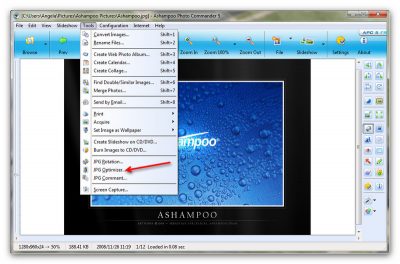
If you upload images as attachments here at SFU, we require that images be no more than 250KB in size. This doesn’t mean you have to make your image smaller, it just needs optimizing, which basically means you lose a little bit of quality but it will barely be noticeable, if at all. Here’s how you do that: Click ‘Tools/JPG Optimizer’:
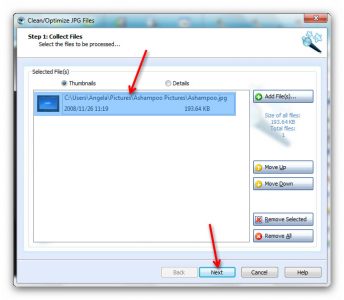
Select the image you want to optimize, then click ‘Next’:
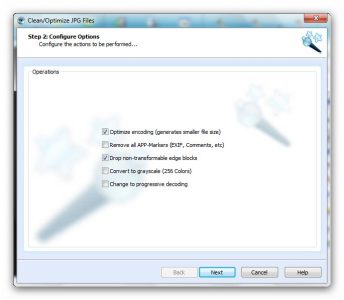
On the next section, leave the options as they are and click ‘Next’:
Once you’ve done this, your image should have a smaller size, but remain the same dimensions.
Once you’re happy with the size, click ‘OK’, then ‘File/Save As’ to save your image. jpg or jpeg give you the best quality images.
And that’s it!
I hope you found this tutorial easy to follow, but as usual any and all feedback is appreciated. ![]()


Recent Comments